
This Dutch Apple Pie Recipe has the BEST apple flavor! A flaky, buttery crust on bottom, cooked apple filling in the center, and the most amazing golden-crisp, buttery crumb streusel topping! This pie is adapted from one of my top recipes, traditional Apple Pie. You are going to love it! I’ll show you just how to make it with step by step photos. Originally posted November 14, 2021.

Table of Contents
- The best apple crumb pie
- What is Dutch Apple Pie?
- Apple pie vs dutch apple pie
- Here is why you will love this dutch apple pie recipe
- Apple crumble pie recipe ingredients
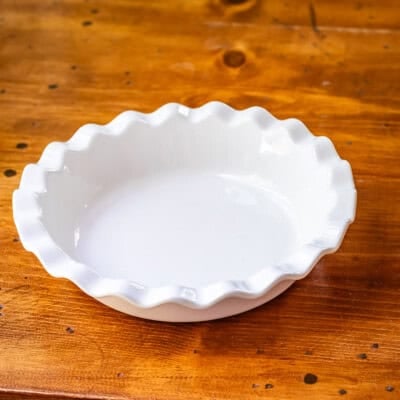
- Tools to use for dutch apple pie
- Best apples for an apple pie recipe with crumb topping
- How many apples are needed for this pie?
- Dutch apple pie: is it better to use cooked or raw apples?
- Best dutch apple pie recipe filling
- How do you keep dutch apple pie from getting soggy?
- How to make crumb topping for apple pie
- Freezing apple pie with crumb topping
- Apple crumb pie FAQs
- More great pies you are going to love!
- Dutch Apple Crumble Pie Recipe Recipe
Does anyone else feel like they are just not with it lately? A giant package arrived in the mail this week, the day before my daughter Valentine’s 5th birthday. Certain grandmas had told me to be expecting something, so I figured this was it and set off to wrap it.
(Eric tried to convince me that it was big enough that it didn’t need to be wrapped. Just slap a bow on and call it good. But I mean come on, what could a 5-year-old love more than ripping a ridiculous amount of paper from a present the size of her body??)
So anyway, I wrapped it all up and tied on the ribbon. On Val’s birthday, we face timed grandma to let her in on the fun. She took one look at the wrapped present and said, that’s not what I sent.
Utterly confused, we opened the box to find a beautiful baby play mat. And we even had a moment looking at each other with blank faces, asking, who would think a 5-year-old would be into this baby toy??
And ONLY THEN did I remember that just days previously, I had bought the play mat for my cousin, whose baby shower is coming up. And I had even commented to Eric about it. “That present for my cousin hasn’t arrived yet, I’d better check the order.”
You guys! What is it with me! I guess I’ll have to wrap it back up again, for the second time. (There’s no “slapping a bow on it” for a baby shower either, Eric. This is your etiquette tip for the day. There will be a test. Just kidding.)
The best apple crumb pie
Tis the season for PIE my friends. I mean I know it’s Thanksgiving and all, but Dutch Apple Pie kind of transcends the holidays, don’t you think?
Raise your hand if you’ve made my Best Homemade Apple Pie? I posted this recipe in fall 2020, and all you Covid hermits went INSANE. I’ve never seen traffic on a recipe like that before. Thousands of people have since made that pie and fallen in love.
I’ve had so many requests over the last year to create a Dutch Apple Pie version of that recipe, and today is the day my friends! The best homemade apple pie, Dutch-ified! But what does that even mean, you ask??
What is Dutch Apple Pie?
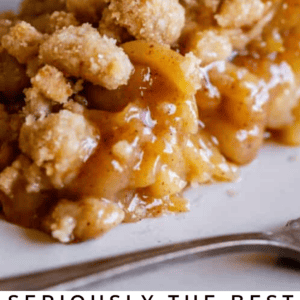
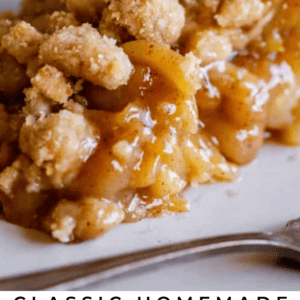
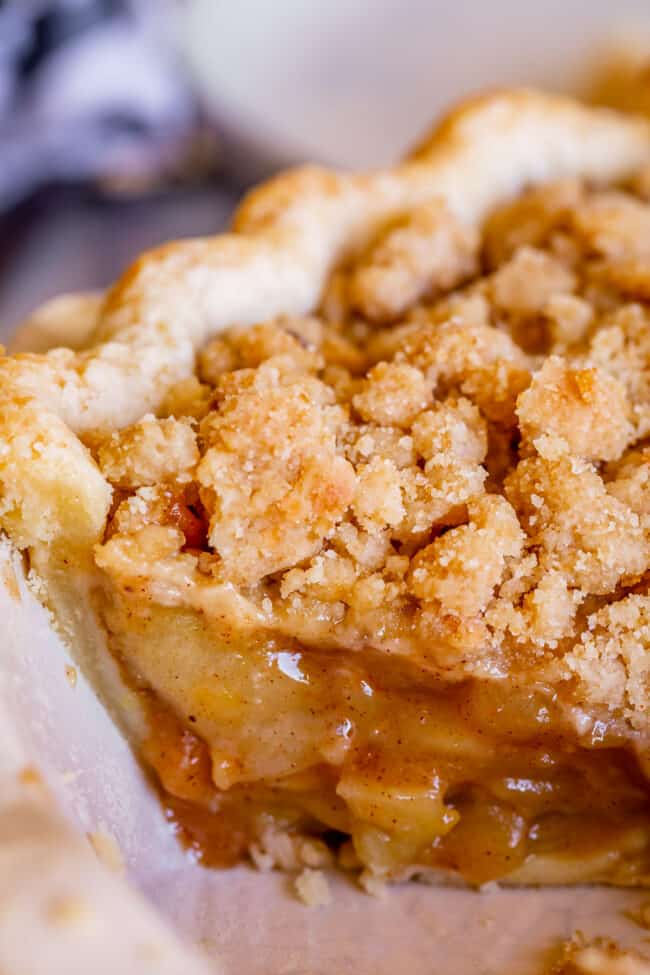
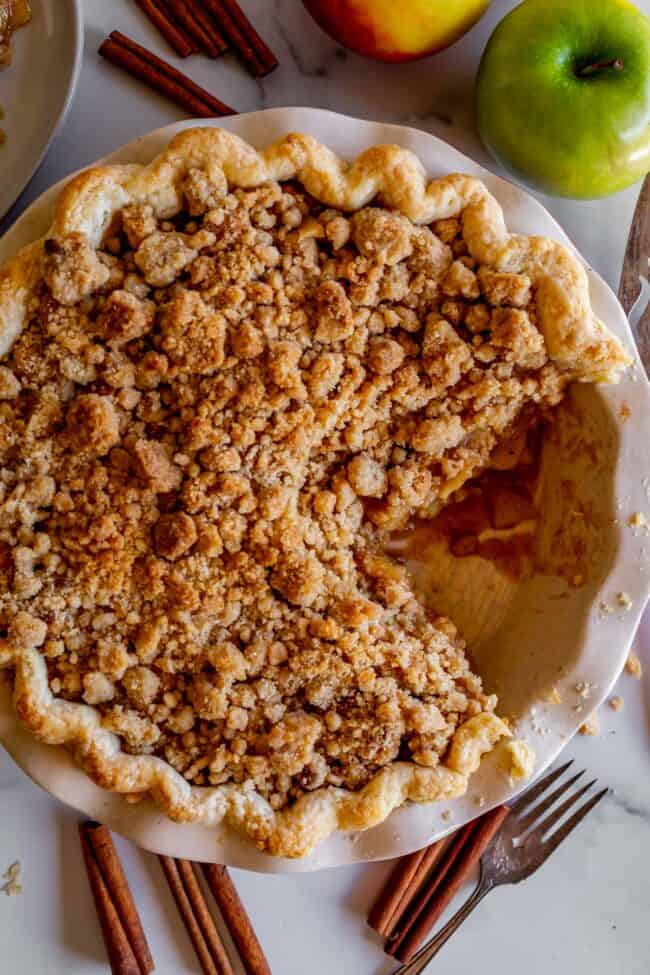
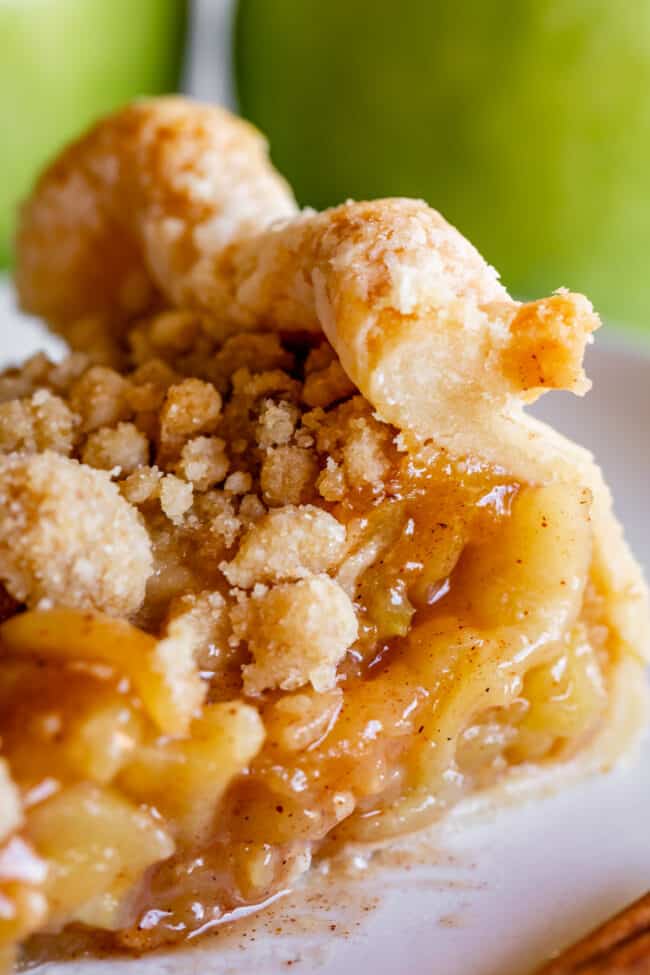
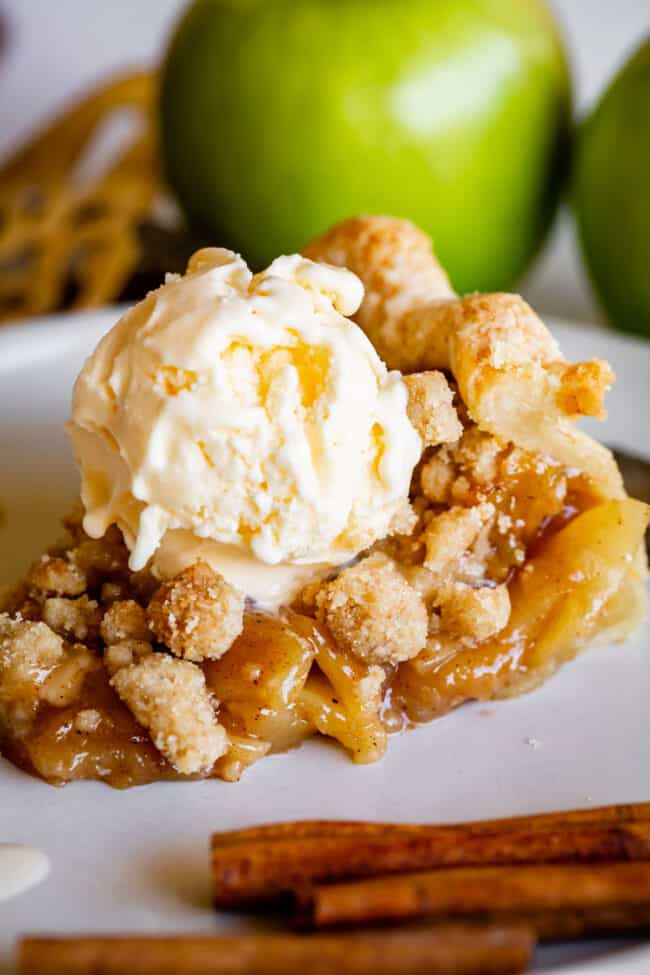
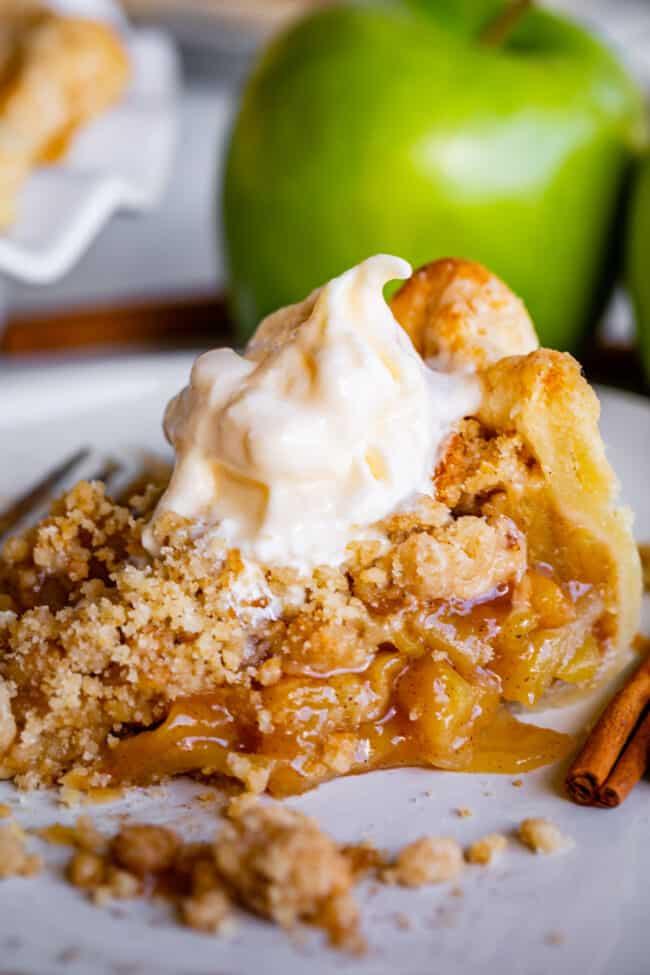
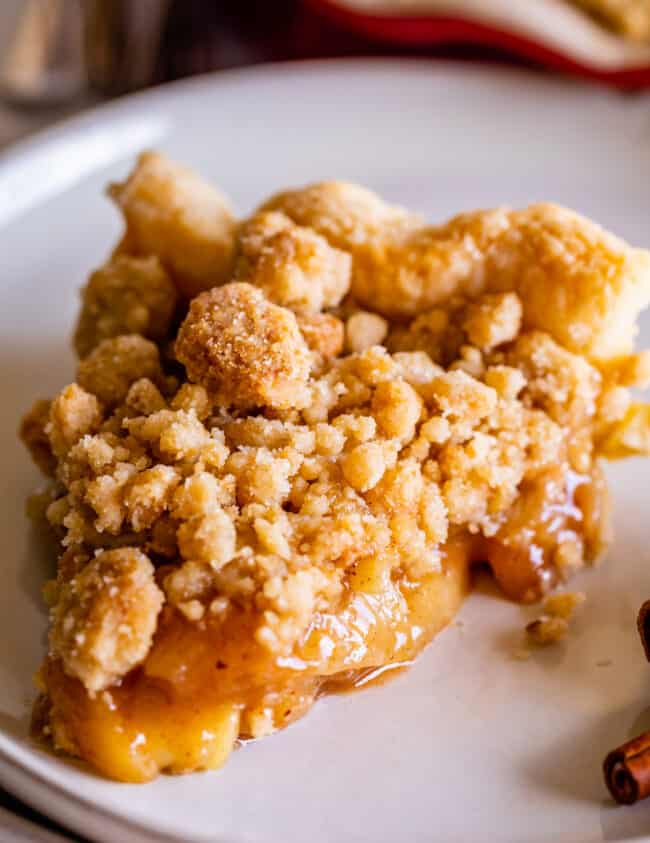
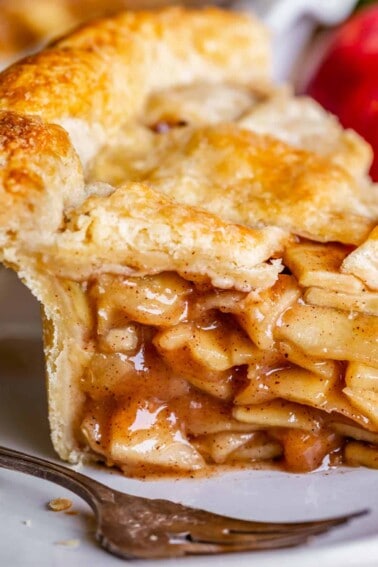
Dutch Apple Pie has flaky crust on the bottom, apple filling in the center, and the most amazingly golden-crisp, buttery crumb streusel on top. It’s heavenly!
Apple pie vs dutch apple pie
Traditional Apple Pie has pie crust on the top and bottom, with apples and sugar in the middle.
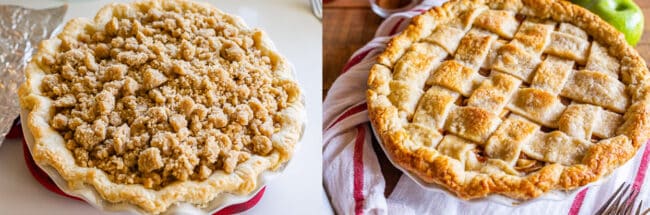
Dutch apple pie, like so many other American traditions, is a combining of cultures. Basically, it’s like traditional Apple Pie (which is French, using pie crust) and Apple Crisp (which is German/Dutch, using streusel on top) got busy and had a pastry-bottomed, crumb streusel-topped baby. A delicious, glorious baby. Business on the bottom, party on the top. Best of both worlds!
Here is why you will love this dutch apple pie recipe
- A homemade flaky, tender and buttery pie crust
- We’re using a heck ton of apples for supreme apply flavor
- The apple filing is cooked on the stovetop to caramel-y perfection. No crunchy raw apples here my friends. (Most Dutch apple pies call for raw apples layered into the pie pan but we are so much better than that.)
- a pinch of cardamom rounds out the cinnamon and nutmeg so nicely
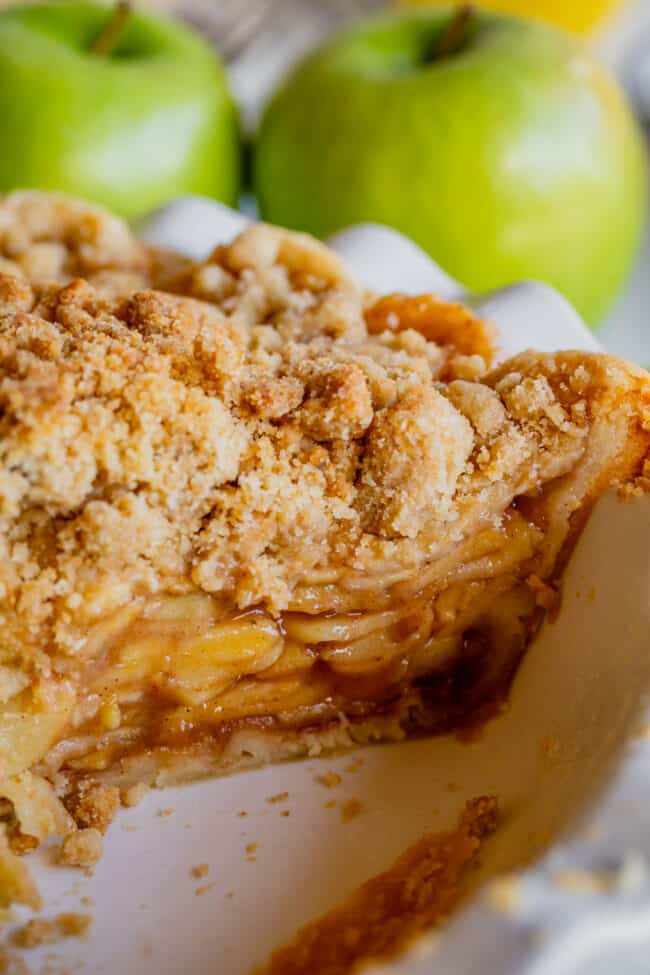
- double the amount of streusel that most recipes call for, because I AM ALL ABOUT THE STREUSEL!
- it’s even easier than regular Apple Pie!
Apple crumble pie recipe ingredients
Here are the ingredients you’re going to need! Quantities are listed in the recipe below but here are the basics:
- Single pie crust
- Lemon juice
- Heck ton of apples (see below)
- Brown sugar
- Granulated sugar
- Flour
- Salt
- Cinnamon
- Nutmeg
- Cardamom (optional, but AMAZING, try it y’all)
- Vanilla
- Butter
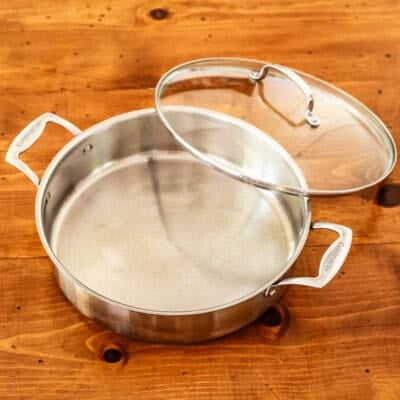
Tools to use for dutch apple pie
These are my favorite kitchen tools to use when I’m making apple pie!


Best apples for an apple pie recipe with crumb topping
An apple pie can only be as quality as the apples themselves. Fortunately these days we have access to a massive variety of apples to choose from. These are my most important tips when it comes to apples:
- Use a ton of apples! The best way to get the MOST apple-y flavor in your pie is to utilize the apples themselves! Most apple pies call for 2-3 pounds of apples. We are using 5 pounds! Like 11 or 12 big apples.
- Use a variety of apples. I used Granny Smith (very tart), Honeycrisp (middle), and Golden Delicious (on the sweet side). Using only one type of apple gives you only one flavor profile. Using a blend means your pie will land somewhere perfectly in the middle of tart and sweet. Here is a list of common apple varieties, listed from most tart (Granny Smith) to sweetest (Fuji).
▪️Granny Smith
▪️Braeburn
▪️Macintosh
▪️Honeycrisp
▪️Red Delicious
▪️Golden Delicious
▪️Ambrosia
▪️Gala
▪️Fuji
If you like pies a bit more on the tart side, grab a few more Granny Smith. If you like them a bit more sweet, go heavier on the Gala or Golden Delicious. I would avoid Red Delicious (too mushy, and honestly if you don’t like to eat it plain why would you want it in a pie? Are there people who actually still eat Red Delicious??)
How many apples are needed for this pie?
Since apples can vary in size, it’s best to weigh them rather than to go by count. However, there are about 3 medium apples in 1 pound. Buy at least 15 to be on the safe side. With the large apples I used, I only needed about 12. If you have leftovers, you have something to snack on while making your pie!
Dutch apple pie: is it better to use cooked or raw apples?
Cook your apple pie filling. My last tip is kind of super duper important: COOK YOUR APPLES. So many apple pie recipes add raw sliced apples to a pie shell, and bake a long time so the apples soften in the oven. I’ve tried this lots of times, and just don’t love it. For one, you risk under baking your apples. Does anyone else hate this as much as I do? Say no to crunchy apple pie! That is the absolute worst!
Secondly, apples have a lot of water, and all that water ends up in your pie if you don’t cook some of it off first. This means your apple pie is not as flavorful.
I tested this pie twice: the first one with uncooked apples and the second one with cooked apples. The raw apple pie definitely had less flavor. It was bland guys. I mean, still a passable apple pie, just nothing to write home about.
The pie with the cooked filling, on the other hand, had a darker, deeper flavor. It was almost caramel-y, and there was more sauce in the filling. There’s no chance of under-baking, and the flavor is INCREDIBLE.
I know it’s inconvenient to cook the filling (even more inconvenient when I tell you that you’re going to have to cool that filling before adding it to the pie) but hey, you didn’t sign up to make an apple pie because you needed a quick dessert, did you? Take the extra 20 minutes to cook the filling. You won’t regret it!
Best dutch apple pie recipe filling
First gather up all your apples.
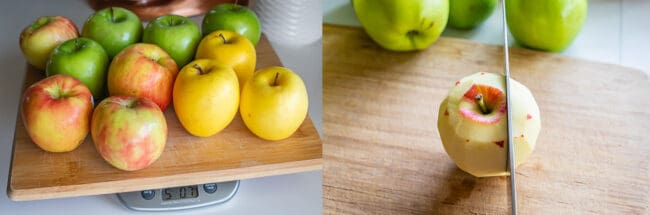
You need 5 pounds before coring and peeling. That’s about 11-12 large apples to make 5 pounds.
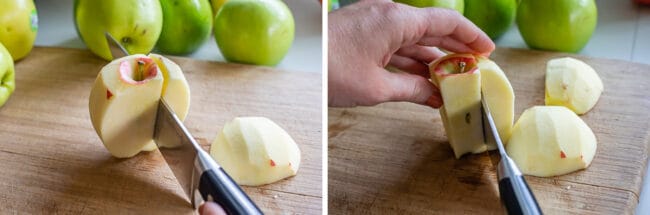
Here’s how I slice my apples. You can use a mandolin if you want, but be sure to use a metal glove. Those suckers are sharp!
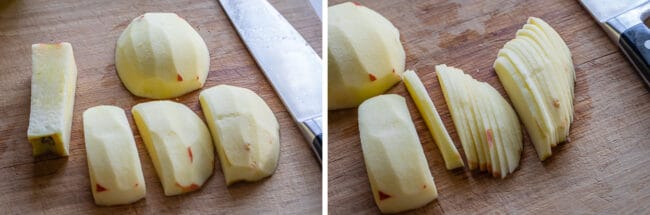
Keep slicing around the core until you have these segments. Then slice to about 1/8 inch. You can slice thicker than that if you like (you may have to cook longer), but I love thin apples in my pie.
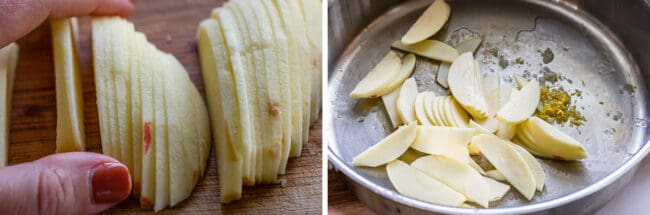
As you are slicing up the apples, toss them in a 12 inch high sided skillet (heat should be off) with the lemon juice and zest. Give it a stir to coat the apples with lemon.
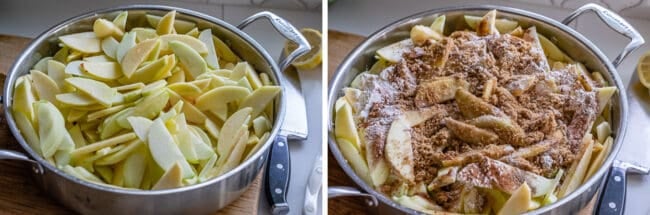
Time to cook it down. Add some sugar, brown sugar, flour, salt, and spices. NO extra liquid, the apples will release plenty!
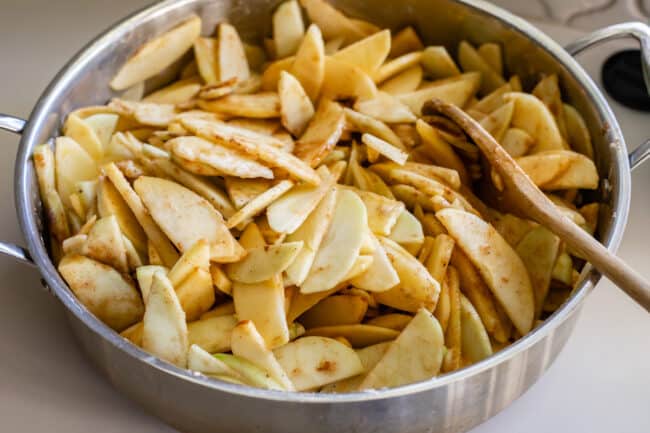
Place it over medium heat and let cook for about 20 minutes. Cover the pan, but stay nearby because you’re going to have to stir the mixture every couple minutes, replacing the lid each time. This keeps the steam in and helps cook the apples. You are going to get this glorious caramel-y sauce going.
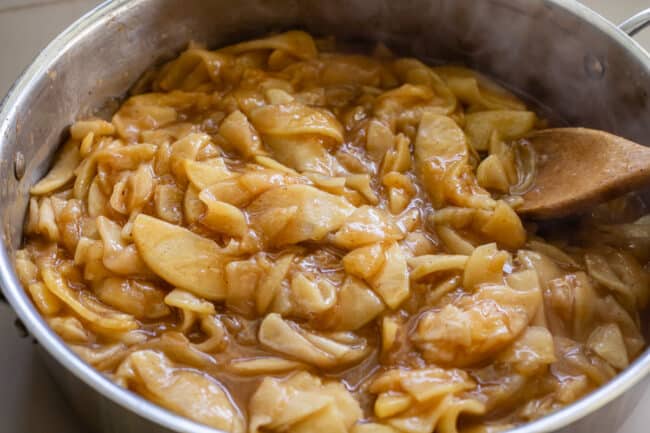
Something magical happens when you gently cook the apple pie filling over a longer period of time like this. The pectin in the apples is converted to a heat-stable form. (Thanks Cooks Illustrated!) That means when you cook the apples again in your pie in the oven, the apples won’t become mushy. Whatever level of “al dente” they are at when you finish cooking them on the stove, that’s how it will taste in your pie. So you can adjust the cooking time a bit to reach your level of apple perfection. Cook longer if you like softer apples; shorter if you like them more firm. You don’t have to calculate for further cooking in the oven. Crazy, right? Science!
How do you keep dutch apple pie from getting soggy?
The biggest trick to prevent a soggy or melting crust is to make sure all your ingredients go COLD into the oven. This includes all 3 components of the pie: pie crust, apple pie filling, and the crumble.
If you added this hot filling into a pie crust right now, it would melt your crust into a sad heap of butter. Your crust will be soggy sad.
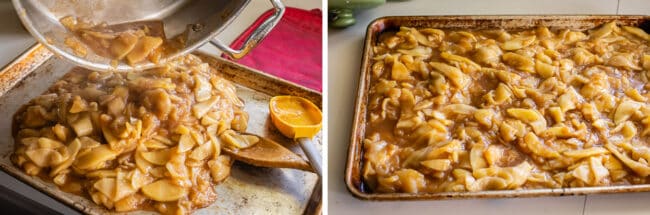
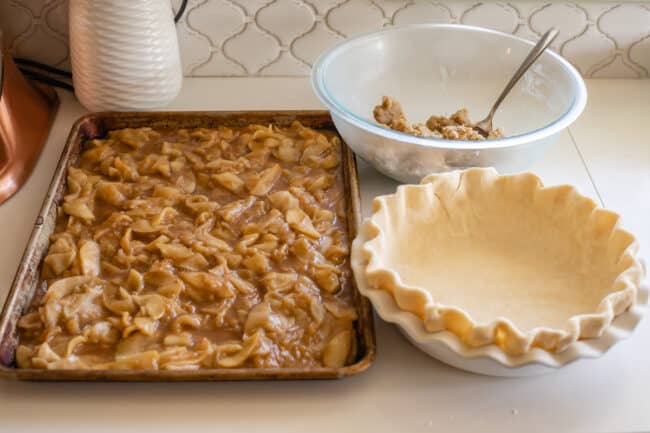
So we are taking that hot apple, caramel-y goodness and giving it a chill. Pour the mixture onto a half sheet pan (any cookie sheet, one with a lip) and spread it out evenly. I stuck mine in the freezer to chill for about 20 minutes. You can put it in the fridge, or just leave it in the pan you cooked it in and wait for it to come to room temperature (a couple hours), if you are not in a hurry.
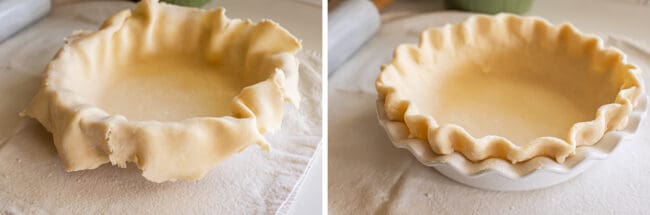
Now for the crust. I have an entire post about How to Make Flaky Pie Crust, you are definitely going to want to check it out! The most important thing to remember is to keep your pie crust super cold before putting it in the oven, so after crimping the edges to look nice, toss it in the freezer for a half hour. Dozens of people have sent me pictures of their apple pie crusts literally melting off because they went in the oven too warm. It’s about the saddest thing to happen to a pie. Don’t skip chilling!
The other important step you need to take to avoid a soggy crust is to blast the heat in the beginning of your cook time. Turn your oven up all the way to 425 degrees and stick a pizza stone (or sheet pan if you don’t have one) on the center rack in your oven. Let it preheat while everything is chilling, about 20-30 minutes. Having direct contact with that really hot surface distributes heat evenly to the bottom of the crust, which results in a firmer, crispier crust. Nobody wants a soggy bottom!
Once your apple pie filling is chilled, pour it into your cold pie crust.

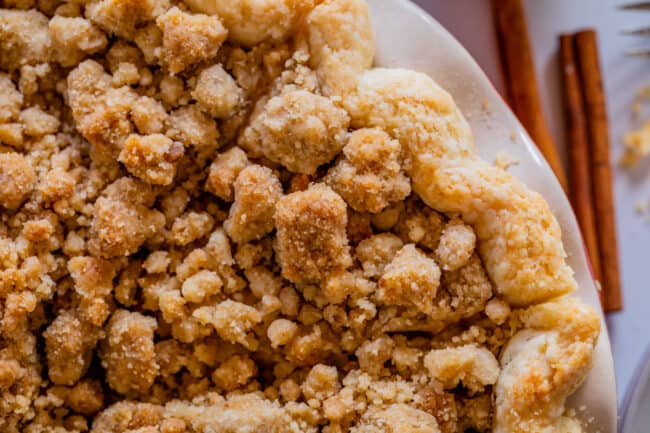
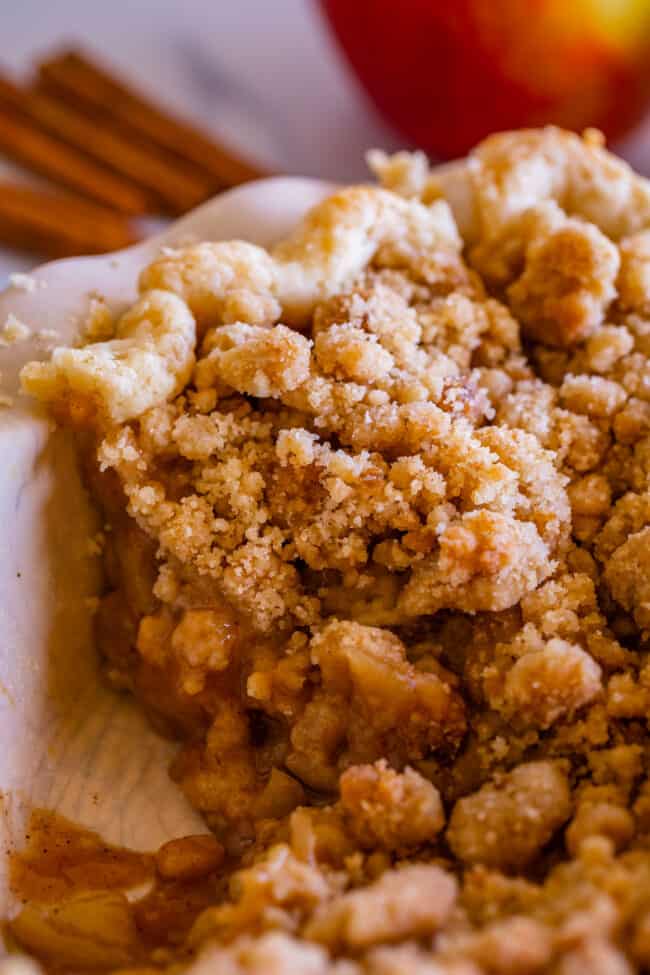
How to make crumb topping for apple pie
Now it’s streusel time! Besides the amazing flavor, one of the best things about a crumb topping is just how easy it comes together.
What is the crumble on apple pie made of?
- Flour
- White and Brown Sugar
- Salt
- Butter
How do you make the crumble for an apple pie?
Grab a medium bowl and add in the dry ingredients: flour, white and brown sugars, a little salt. Whisk em up.
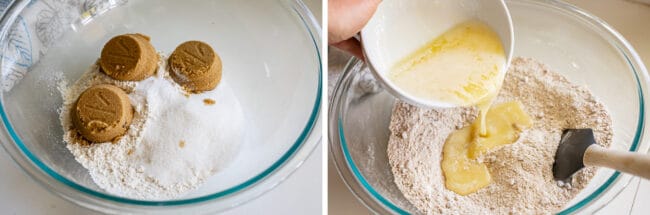
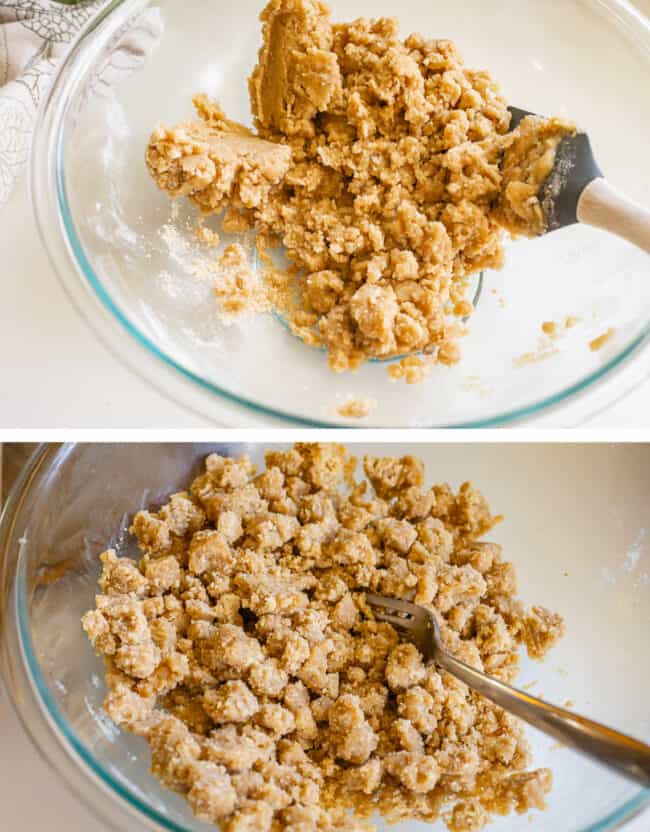
Then melt some butter and drizzle it over the top. Use a fork or spatula to mix it together, but don’t overdo it! It’s going to come together like cookie dough almost. Chill for a few minutes, then use a fork to break it up into crumbly bits. I’m a sucker for HUGE bites of crumble, but you can mix it into a sandier texture if you prefer.
Here’s all your components chilled and ready to assemble!
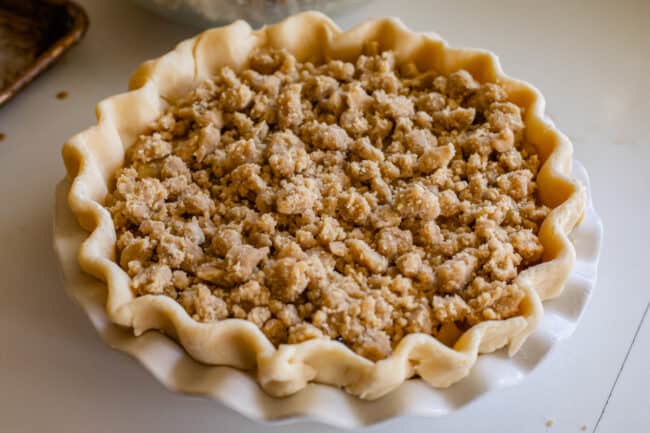
Top your pie with just enough crumble to cover the top. Don’t use all of it! Probably about a cup. Stick the rest in the fridge for later.
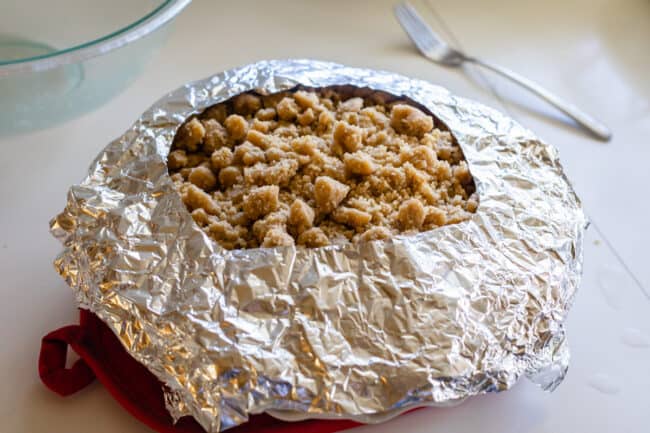
Bake about halfway, then we’re lowering the oven temperature a bit and adding the rest of the crumble. Adding the crumble in layers like this makes the topping nice and thick how I like it, but crispy and golden all the way through. It’s the price you pay for a ridiculous amount of streusel on your pie. I’ll take it! (we have to shield the crust anyway so we’re already taking the pie out of the oven. See below)

At this point we’re also going to top the edges of our pie with a crust cover made from super fancy tin foil. Tear off a square of foil about the same size as your pie. Fold in half, then in half again, and cut out the center. Open it up again and voila! You’re pie is ready for outer space! Just kidding. This will let the center of the pie brown without burning the edges.
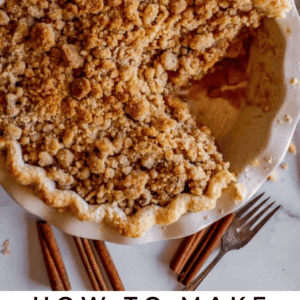
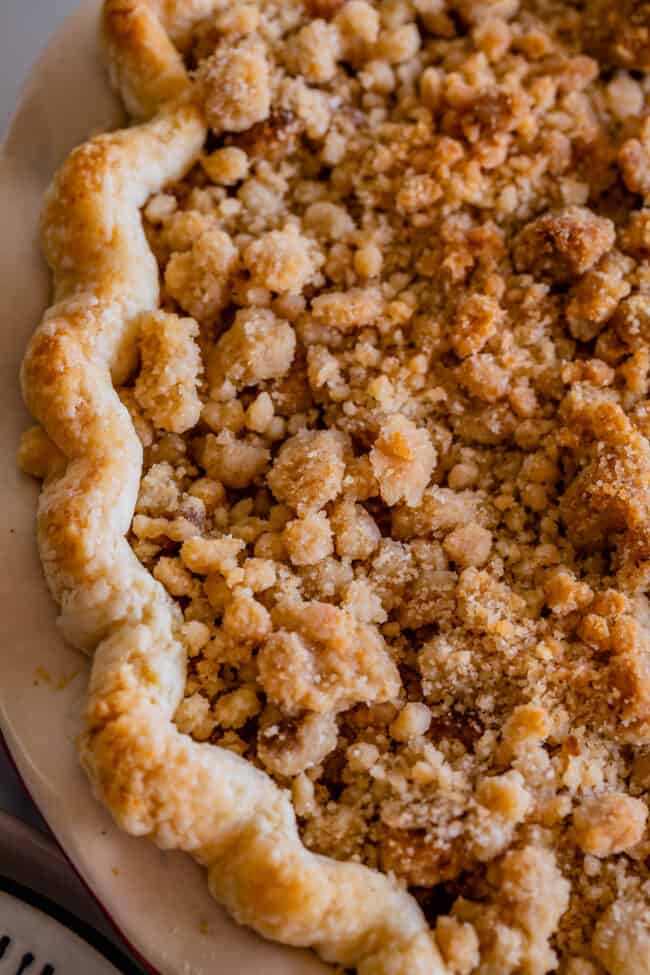
You’ll know your pie is ready to come out when the crumble is a nice, light golden brown and the edges are brown.
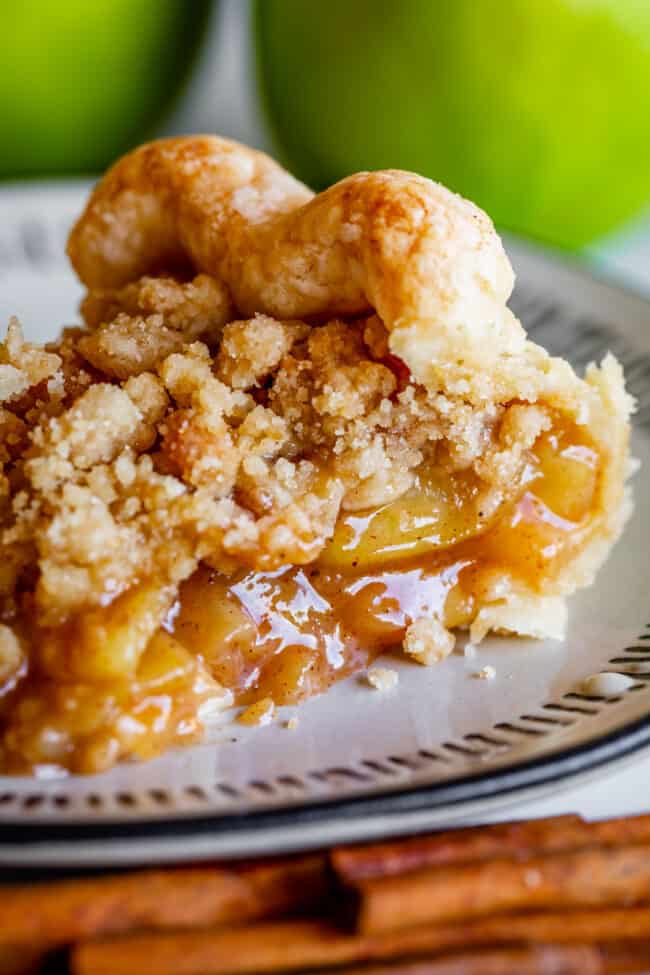
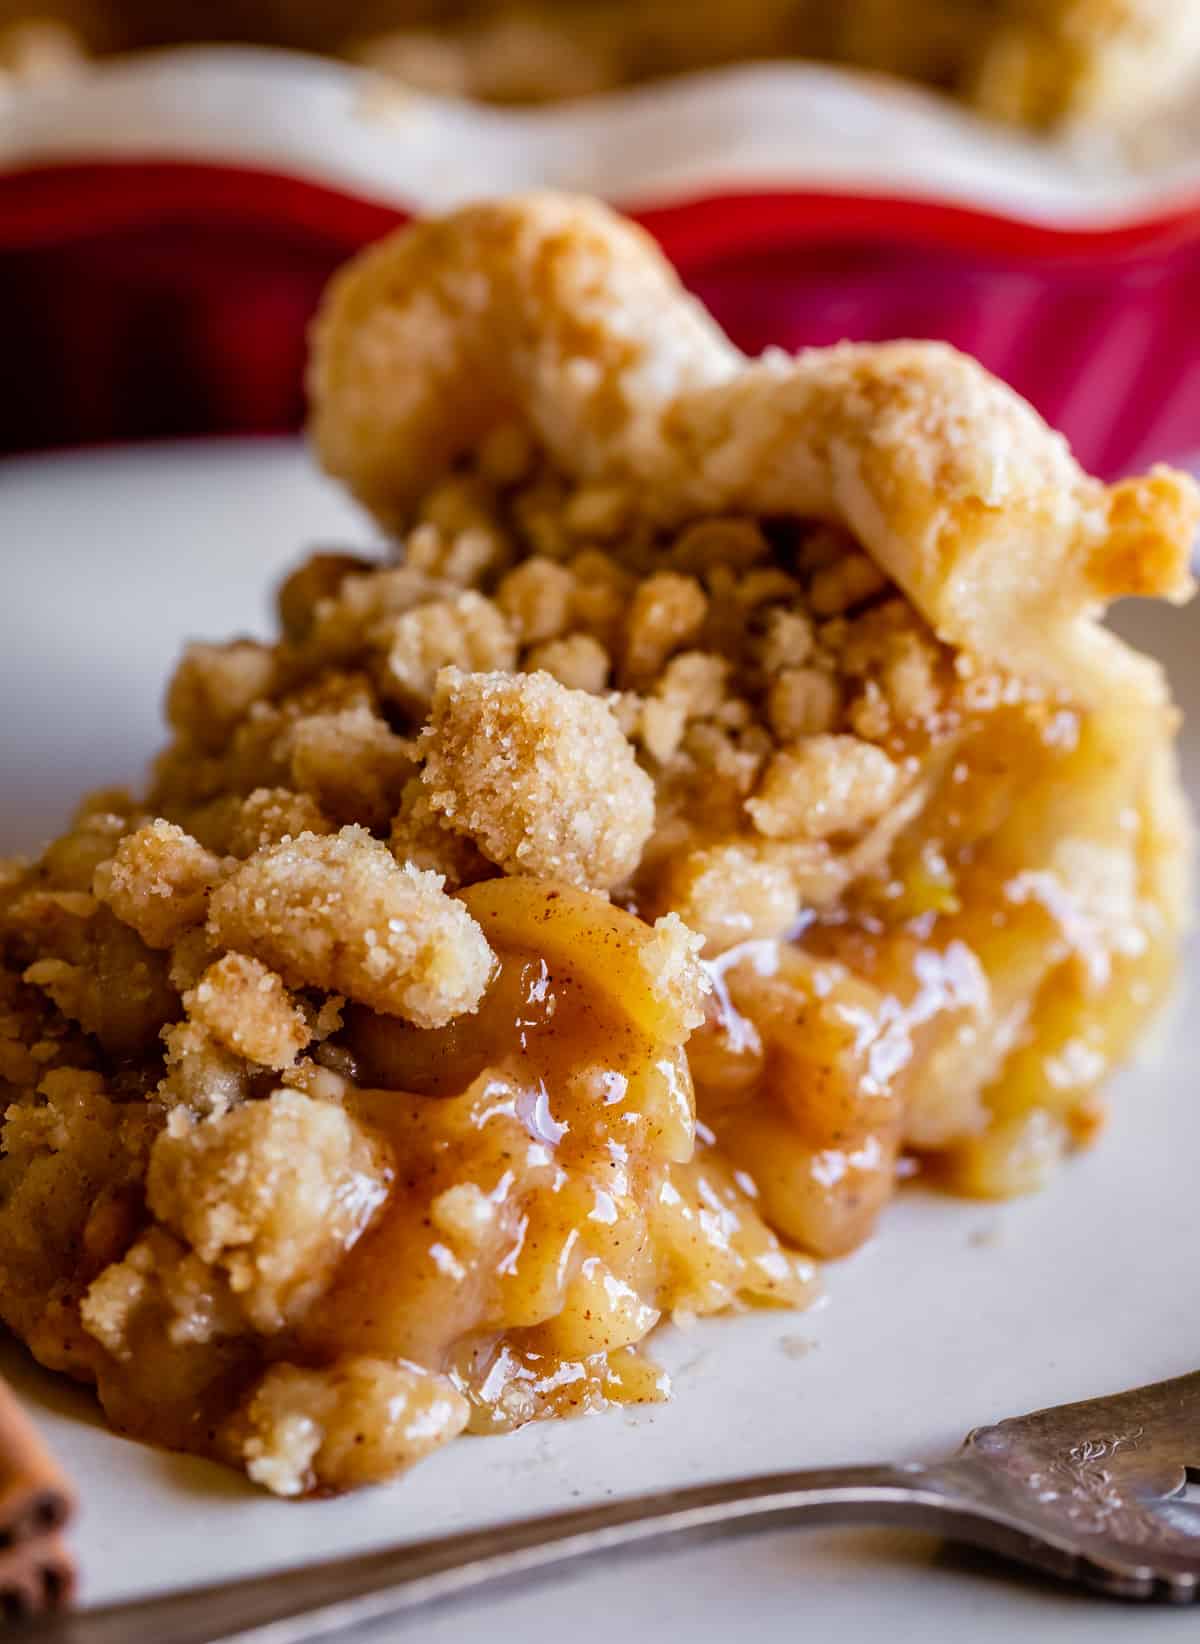
Let the pie cool on a rack for at least 4 hours before digging in. I know, this is killer! But if you cut into it now it won’t really be pie, it will be soup. The juices need time to return to room temperature to be the right consistency. Don’t forget to serve it with some delicious Salted Caramel Sauce!
This is a great pie for making ahead (see more below), but once you cut into it, it needs to be eaten very soon afterward. The problem is that once the moisture inside the pie touches the dry crumble on top, the wetness spreads and makes your whole crumble wet. So it’s a great pie to make the day before your event, just make sure not to sneak a slice, or your crumble won’t be crumbly. You must resist!
Your pie is best served the day after making it, without any early cuts made. (This is why it’s perfect for Thanksgiving!) Store leftovers on the counter loosely covered with plastic wrap or foil for about 2 days. After that stick in in the fridge.
Freezing apple pie with crumb topping
Dutch Apple Pie is such a great candidate for making in advance: it freezes beautifully. (Total life-saver during the holidays!)
There are 3 ways to make your pie ahead of time.
- The first is to make the crust, filling, and topping and freeze each separately in freezer ziplock bags. Thaw in the fridge, then follow the directions for assembly and baking.
- If you prefer, you can completely assemble the pie in the pie pan, then wrap the whole pie, pan and all, really well in plastic wrap and then foil (I suggest two layers of each to avoid freezer burn) and the second half of the crumb topping in a small freezer ziplock bag. Store upright in the freezer for 1- 3 months. See notes for instructions on how to bake.
- To freeze after baking the pie, allow the baked pie to cool completely, like a full 8 hours. Wrap it really well in plastic wrap and then foil (I suggest two layers of each to avoid freezer burn). Store upright in the freezer for 1- 3 months. See notes for cooking instructions!
Apple crumb pie FAQs
If you’ve made an apple crumb pie the traditional way, just layering in raw apples, then it’s not surprising that your pie is watery. Apples release moisture as they cook. This recipe solves that problem by cooking the filling before it goes in the pie. It makes for a super caramel-y, perfectly textured, no-moisture-releasing apple pie.
It shouldn’t be all the way to crunchy, but it should be crispy. It won’t be all the way to a potato chip crunch. It WILL get soggy after you cut into it, because the moisture from the apple filling will spread to the topping. That’s why it’s best NOT to cut into this pie until you’re ready to serve it, crisp perfect streusel topping intact.
Crumble topping will be soggy if you’ve cut into the pie and the moisture from the filling has had time to reach it. It will also be soggy if you cut the pie before you let it cool completely. It’s best to chill the crumble topping before baking it so the butter is cold when you bake it.
I would love to hear if you try out this pie! Especially if you’ve already made my original Apple Pie. Let’s hear how you think they compare!! It’s like choosing a favorite child, kind of. Happy pie baking!
More great pies you are going to love!
- The Best Homemade Apple Pie << this is one of the top recipes on The Food Charlatan!
- Apple Custard Pie with Cinnamon Streusel << Like today’s pie, plus a custard layer!
- Pecan Pie with Butter Streusel Topping << streusel is life.
- Crème Brulée Pumpkin Pie << You will never eat a regular pumpkin pie again. Crackly top forever!
- French Apple Cake from Once Upon a Chef
- Apple Pie Bars << a pie you can eat with your hands! The crust is unreal.
- Apple Crisp, with a Ridiculous Amount of Streusel << but really though.
- Homemade Peach Cobbler << can be made with fresh, canned or frozen peaches!
- Key Lime Pie from Spaceships and Laserbeams
- No Bake Peanut Butter Pie from Fresh April Flours
Dutch Apple Crumble Pie Recipe
Ingredients
- 1 homemade single pie crust, 1 sheet of pie dough
For the apple filling
- 1/4 teaspoon lemon zest
- juice from half a lemon, 2 tablespoons, no more
- 5 pounds apples, 5 pounds before peeling and coring
- 1/2 cup brown sugar, packed
- 1/2 cup granulated sugar
- 1/3 cup all-purpose flour
- 1/2 teaspoon kosher salt
- 1 & 1/2 teaspoons cinnamon
- 3/4 teaspoon nutmeg
- 1/2 teaspoon cardamom, optional
- 1 teaspoon vanilla
For the sugar crumble
- 1 & 1/2 cups all purpose flour
- 1/3 cup granulated sugar
- 3/4 cup brown sugar, packed
- 1/2 teaspoon kosher salt, use a little less if using table salt
- 3/4 cup butter, melted (1 and 1/2 sticks)
Instructions
- Choose your apples.You need 5 pounds of apples for this recipe, which is about 11 large apples. I like to use a mix of apples for the best flavor. For this pie I used Granny Smith, Honeycrisp, and Golden Delicious.
- Make the filling: Use a microplane grater to zest 1/4 teaspoon lemon peel into a 12-inch high sided skillet. The heat should be off.
- Add the juice from half the lemon to the skillet, about 2 tablespoons. Don't use much more than this, you're not making a lemon apple pie. We just want to wake up the apples a bit and keep them from browning.
- Use a potato peeler or this handy apple peeler to peel the apples. Slice the apples into 1/8 inch pieces. Check out the photos above to see my method for slicing apples. I like to peel and slice one apple at a time so that they don't get brown: I peel one apple, then stop and slice it, add it to the pan with the lemon juice, and then move on to peeling the next apple. Stir the apples in the pan occasionally to coat everything with lemon juice.
- Once you have all the apples peeled and sliced in the pan, set it over medium heat on the stove.
- Add 1/2 cup packed brown sugar, 1/2 cup granulated sugar, 1/3 cup flour, 1/2 teaspoon kosher salt, 1 and 1/2 teaspoons cinnamon, 3/4 teaspoon nutmeg, and 1/2 teaspoon cardamom (optional). Stir it together gently so you don't break all the apples.
- Once the mixture is all moistened and you don't see patches of flour or cinnamon, set a timer for 20 minutes. Cover the mixture completely with a lid, but don't walk away. Stick around and stir the mixture every 3 minutes or so, replacing the lid each time. Cook for 20 minutes, until the apples are fork tender but still hold their shape. The apples will not soften more while baking in the oven. So have a taste and see if you want to cook a longer or shorter time. Only you can know your apple al dente perfection level. If your apples start to stick to the pan, add 1 tablespoon water (plus more as needed); use sparingly.
- Remove the pan from heat and stir in 1 teaspoon vanilla.*
- Transfer the apple pie filling (including all the the brown caramel gooeyness) to a half sheet pan, or any pan with a lip. Spread the apples all the way to the edges. Cool the apple pie filling completely by placing it in the fridge or the freezer. If you put it in the freezer, it only takes 30 minutes or so. (If you have plenty of time, you can just leave the apples in the pan to cool down; it will take a couple hours.)
- Roll out your pie dough and place in a 9-inch pie dish. Fold the edges underneath and crimp them with your fingers and thumbs. See my pie crust recipe for lots of photos and details.
- Place the pie crust in the fridge or freezer for about 30 minutes, for a really flaky crust.
- While the crust and filling are chilling, place a baking sheet or pizza stone in the center rack of your oven and preheat to 425 degrees F. Let it heat up for at least 20-30 minutes to make sure it's really hot.
- Make the sugar crumble:In a medium bowl, add the dry ingredients for the crumble: 1 and 1/2 cups flour, 1/3 cup white sugar, 3/4 cup packed brown sugar, and 1/2 teaspoon kosher salt (use less for table salt). Whisk together.
- In a small bowl, melt 3/4 cup butter (1 and 1/2 sticks). Pour the butter over the dry ingredients and stir together gently. You should end up with a pretty wet sandy mixture with some large clumps. See photos. Let it chill in the fridge until you are ready to assemble. Try not to eat it all.
- When the apple pie filling in the freezer is completely cooled, and the pie shell is mostly frozen, take them out of the freezer. Use a rubber spatula to scrape all the chilled apple pie filling into the pie shell. Don't forget to scrape in every last bit of the gooey filling.
- Use your hands or a fork to break the crumble into smaller bite size pieces. Top the pie with about a cup or two of the sugar crumble, not all of it! You only want to add enough to cover all the apples, we are not piling it on. (That's for later.) Place the remaining crumble back in the fridge to chill.
- Bake the pie:Place the chilled pie onto the baking sheet in the oven and let bake for 15 minutes at 425 F. The crust on the edge should be turning light brown.
- Meanwhile, get a square of tin foil that is the same size as your pie. Fold it in half, then in half again. Cut out the center. Open it up again. You should have a square of foil with a circle cut out of the center (or use a pie shield). See pie crust post for more details.
- After baking at 425 for 15 minutes, reduce the heat to 350 degrees F. Don't take the pie out of the oven. Just change the temperature. Bake at 350 for an additional 10 minutes.
- At this point, remove the pie from the oven and quickly shut the oven door.Sprinkle the remaining chilled crumble all over the top of the pie. Break up large pieces with your fingers. Place the foil on top of the pie crust (the center of the pie should be exposed). Loosely crimp it around the crust on the edge. This will protect the edges from burning.
- Don't forget that your oven temperature should be at 350. Place the pie back on the hot baking sheet in the oven and bake at 350 for about 25-35 more minutes. (the pie should be in the oven for a total of about 55-65 minutes)
- You will know the pie is done when the edges of the crust are brown and the crumble is turning a light golden brown in the center. If you want your crust and crumble to brown a little more, remove the foil shield and bake another 5-10 minutes.
- Let the pie cool on a wire rack for about 4 hours. I know, this is killer. But if you cut into it now, the juices will be lava hot and way too liquid-y. Your crumble will get wet and soggy sad. You have to wait for it to cool to room temperature to get the right texture for the filling AND to not ruin the crumble. Pie! A lesson in patience indeed.
- Once the pie is completely cool, slice and serve! My husband Eric considers it a crime to serve this without vanilla ice cream, and I tend to agree. Treat yoself right. Drizzle on some Salted Caramel Sauce for a really decadent treat!
- Store the pie on the counter for up to 2 days, covered with plastic wrap or foil. After that transfer it to the fridge.
- See notes for detailed freezing instructions!


So I made two apple pies today (no I haven’t been drinking) First, I made my old standby apple pie – that one went over to the kids and grandkids. Then I made this Dutch Apple Pie. While it was baking I said to myself, too many steps – I’ll stick with the old one. Then I tasted it.
OMG !!!!! I do not usually love apple pie but I may sneak out of the bedroom tonight, grab a fork and eat the whole thing before I have to share anymore with my husband.
Karen I love your site – I love your stories and I have yet to find a recipe that is not awesome. I am soooooo glad I found you!!!
Claire this is cracking me up! PLEASE let me know if the nighttime fork shenanigans happens!! haha! Thank you so much for your kind words, and for reviewing! The best gift you can give me ❤️ so glad you enjoyed it!
This was the first pie I’ve ever made, and it turned out perfect! I added a couple of tablespoons of water to the apples (as the recipe suggested if the apples weren’t super juicy), and the filling turned out perfectly gooey while the apples still had a little bite to them. I cooked the apples the day before so they were completely cool, and I let the pie crust freeze completely before assembling and popping it all into the oven. I ended up cooking it with the foil off for about another 15 minutes (after the full 65 from the recipe) to get a nice brown on top, but it may be that my oven temp is low. Other than that, I followed the directions exactly. Great recipe!!
I love this recipe. I’ve never cooked my apples before baking into a pie, which is honestly a brilliant suggestion. The pie is currently cooling, and smells divine. I would recommend a deep dish pie pan if it wasn’t mentioned, because the filling is so ooey gooey and generous, it pushed some of the crust edges off. Thank you for a wonderful recipe. I’m sure my husband will be so happy to have this after a hard day at work. I’d love to submit a picture alongside the comment, but I’m not finding an option too. Thank you again<3
Hey, I haven’t made this recipe yet but I’m planning to :) is it okay if I pre bake my crust? I don’t want the bottom of the pie to be soggy.
Hi Harper! No need to pre bake your crust. Adding cooled filling to a chilled crust ensures that the bottom of the pie won’t be soggy (and if you pre bake, the crust edges will get too dark). Enjoy!
The worst apple pie I’ve ever made and it took all day long. Cook, cool. That way it’s not too wet the recipe said. No problem there. It’s dry and the topping is too much, too dry. I kept thinking the topping with all that butter would make the pie a little more juicy or something because after cooking the apples, the filling looked too dry. I suspected this was going to be a problem. I have a fantastic recipe I use all the time but wanted to try something new and wanted to precook some apple filling because I had so many apples, I wanted to freeze the filling for future apple pies, so I used all the apples to make two pies and some pre-made filling to freeze and use later. I am so disappointed that I used all of my apples for this recipe. I’m debating throwing both pies away. I’m not kidding. I can’t serve this to other people. I should take my usual recipe and bronze it for my grandaughter. So disappointed. In defense of the recipe, I didn’t know that I don’t like brown sugar in my apple filling, but none of my comments are related to the taste of the filling. I used light brown sugar, so it wasn’t acutely molasses flavor. Nonetheless, it’s actually hard to taste the filling with all that topping drying out the slice of pie. Which is, again, so hard to believe since there were 3 sticks of butter in the topping for 2 pies. I followed the recipe to the tee. Ugh.
Hi Deb! So sorry you had such a bad experience! I’m wondering if you cooked the apples for too long? Also, if your apples are not very juicy, it’s helpful to add water a couple tablespoons at a time during the cooking process, so they don’t stick to the pan too much. There are photos in the post of exactly what the filling is supposed to look like, you can see that it’s not dry. I hope it works out next time!
I have made this pie a few times and everyone raves about it! It is a process but I feel well worth the effort:)
Admittedly, this was pretty labor-intensive—but all worth it! I used about half the amount of sugar and added oats and chopped walnuts to the crumble topping. Fabulous!
My gluten free version just came out of the oven and looks perfect! The countdown has started! The pie needs a bodyguard to keep my husband from breaking into it before it’s time! I was a little short on apples, which worked out fine because the gluten-free pie crust is a little bit smaller than a standard one. But I didn’t cut down on sugar, flour, or butter. Why would you? :-)
Can you precook the apples the day before and then assemble & cook the next day?
You can do it over two days if you want to Tracey, sure!
Hi! Your recipe is delicious. However when I cut into it the next day, I found the streusel touching the apples was melty/soggy. My streusel topping also doesn’t look so brown and crumbly as yours…I used the whole amount of butter. Could it have been too much?
Hi Kate! I think maybe leave it in the oven a touch longer next time!
Butter supposed to be cold, put in fridge and use that curved thingy that cuts butter into those pie crust balls when making pie crust, I did it after I mixed the whole she bang, got pretty lil balls! Just had to wait for butter to turn back solid and do the work! Great recipe!! I added a few of my own tweaks. I love Dutch apple
I ahd the same thing happen. All the butter crumbs just melted into the pie. It looks like a big mess. I’m so disappointed because I did two pies.
So sorry to hear this happened to you Maxine! I’m wondering if you chilled the crumble, added half to the pie, then chilled the remaining crumble until the last 25-35 minutes of baking. That’s all I can think of that could have happened, because this pie has been tested many times with chilled crumble! I hope your next pie turns out perfectly.
This recipe was lovely to make easy to follow directions. I did not have a soggy or watery anything it was all cooked and consistency was good all over and this is going in my book of recipes that we love. In fact my oldest son whom is 30 said he’s had his share of apple pies and crisps as it’s one of his favourites that this one was the best . So, thank you in helping me provide a delicious Sunday desert for my family. 🫶🏽
Hi! I wanted to thank you first for this great recipe.
How long do you bake the pie after par baking the crust and fill it with the apple filing?
Hi Mary! Thanks for your question. Here are the baking times and what’s included in each step:
1. Bake the pie crust with the filling for 15 minutes at 425 degrees.
2. Reduce the heat to 350 degrees and continue baking for 10 minutes.
3. Add the crumble topping and foil shield to prevent over browning and bake for an additional 25-25 minutes (still at 350 degrees).
Enjoy!
Hi! My son responded to this pie the same as Christie’s (above comment). I love baking pie so my sons have tasted many of them over the years. Will said this was the best apple pie he’s ever had!
I’ve made it twice in the last two weeks and I’m sure I’ll make it many more times. Everyone loved it! Thank you!
Plan to do this with a slew of apples my kiddo keeps bringing home from school (they’re mostly Mac’s so I’m adding Granny Smiths and some Golden Delish… question, although this looks absolutely decedent, I wondered about adding Carmel drizzles…wondered what you thought, if the wet Carmel would ruin the crumbles (perhaps I should only add Carmel when serving by the slice)?
Thanks for letting me know when you have a free moment!
Hey Anne Marie! Yes exactly, I would serve the pie with caramel drizzle, not incorporate it into the pie itself. Here’s my Salted Caramel sauce that I just posted, it would be perfect!! Enjoy!
Ohh-la-la, I can NOT wait to try this! I’m drooling!! 🤤 THANKS!
Just took mine out of the oven at 4pm…and so begins my 4 hour wait (tic-tock, tic-tock). I know the bible says something about “patience producing character…” but I’d happily forfeit whatever ‘character’ for a piece right now! But having made 2 of these last year, I know well what awaits me is a greater reward: crumbles the way God-intended, crumbly!! I was fortunate enough to have some of the lava bubble out onto my cookie sheet, so even though I’m obediently waiting, I STILL got to taste it from the cookie sheet puddle! 😋 Awesome! I guess it IS a good thing to have these next 4 hours available so I can make the caramel sauce (ever since I saw the pic in this recipe last year, the idea of caramel drizzle over apple crumb pie has been in my head but was waiting on Fall apple season to make this pie, so as a cheap substitute for the craving, I warmed-up some caramel dipping sauce and drizzled it over a slice of Entenmenn’s crumb coffee cake! Don’t judge me! It appeased the caramel-craving-monster, and got me moving on making 2 of these pies today! 🥧 🥧 I have high-hopes of freezing the 2nd for Thanksgiving… that didn’t pan out last year (my family rationalizes pie-for-breakfast, and I can’t think of anything to refute their arguments, so our family of 3 knocks off your pie with ease)! It’d just be so nice to be ‘ahead’ of Thanksgiving for once, so I’m gonna have to double-wrap it & hope they forget about #2 🥧😋 …and spring it on ’em next month!
🕖 🕖 8pm can’t come soon enough!🥧🤤
Hi! First, thank you for the way you wrote the recipe…I appreciated the steps in order, along with the ingredients listed with the steps. I’ve been cooking and baking many years, and this was a perfect way to write a recipe.
Okay, so I have all the components chilling right now, and I’ll bake it this evening, but the pie is for tomorrow. Should I just leave it out on the counter overnight wrapped in plastic or foil after it cools down?
And what if we wanted to warm it just a little before serving. Warm apple pie with that cold scoop of ice cream. Would that mess up the inside or streusal?
Thank you!!
Luci
Hi Luci! Thank you I’m so glad the recipe was easy to follow! Here’s what I would do, bake it all tonight but don’t cut into it. Then yeah wrap loosely in foil overnight, leave it on the counter. Then I would rewarm the whole pie at like 300 for 10-20 minutes until mostly warm but not super duper hot if that makes sense. Enjoy!!
Can I use a frozen premade Marie Callendar pie crust instead of making one? Would the process be the same? I just can’t wait to make this.
Hi Joanie! You can, and the process is the same, but it’s totally worth trying the homemade pie crust if you have the time. Either way, enjoy, and let us know how it turns out!
Hi! I’m so excited to try the pie, just waiting for the crust to chill and oven to preheat. My question is, can I cheat the 4 hour cool down time by putting it in the fridge?
Hi Madeline! You can try it, but it can get gummy in the fridge; I recommend waiting the full four hours for the best texture. Enjoy!